Pages

Showing posts with label windows. Show all posts

How to create hard disk partition without formatting the data after installation of microsoft windows without any partition software[latest][2014]

How to create hard disk partition without formatting the data after installation of microsoft windows without any partition software[latest][2014]


hey guys the is android wheel today we are going to tell about how to create hard disk partition after the installation of microsoft windows without any data recovery softwares.the recovery softwares are sometimes becomes viruses,so here is the technique for you to create partition of your hard disk without formatting the data.
 Some times after the installation of new fresh  microsoft windows
you might face the problem "how to create partition ,shrink partition or extend the partition"
because this have to be done before the installation of  microsoft windows
but it can be done after the installation of microsoft windows
maybe you wanted the different partition for storing data or for back up purposes and several other recovery softwares etc.
Here is the solution for this..
Just follow my steps
step 1 . Right click on my computer icon


 Step2. click on storage>disk management


I have a partition of 140GB unallocated size and a drive of 10 GB which is full of data.


 See new volume D have some data in it.
 I'll extend 10 GB to 150 GB partition without formatting the data.

 Simply right click on drive and select Extend volume


Disk 0 is unallocated partition  which is automatically added to your partition .
click next and finished.

 Now see  partition is extended to 150 GB

 See the data is safe.
 Now i'm gonna show you how to shrink or reduce the partition size.

 Just right click on selected drive >shrink volume
 Enter the amount of space to shrink .
 see in snapshot the partition of 150 GB is shrinked to 50 GB
And now i have 100 GB unallocated space
As you see property of drive capacity is 50GB,used space is same as previous ones ..
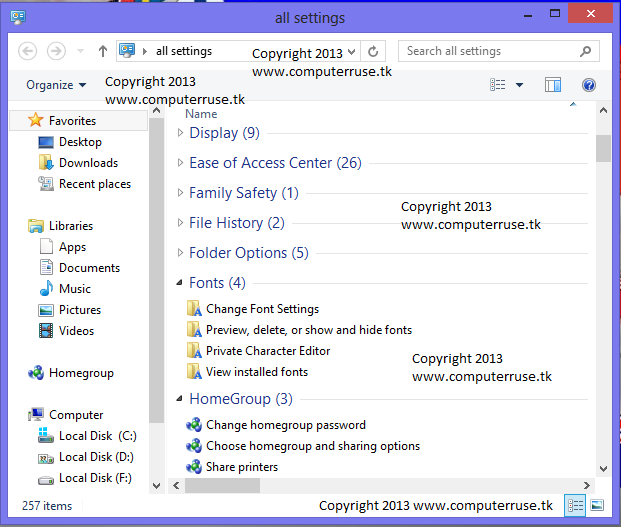


view all type of settings in a folder in windows 8


First, make sure that you can view hidden files in File Explorer, the system navigation app that in
earlier versions of Windows was called Windows Explorer. Run File Explorer, click the View tab, and check the boxes next to "Hidden items" and "File name extensions" in the Ribbon at the top.

Change The Icon of Your USB Pendrive or Removable Disc

Change USB Icon


Change USB Icon
1. Before giving custom icon, your USB icon will be default according to your windows theme. My one was as below :Default icon of USB pendrive
Default icon of USB
Default Pendrive Icon
2. Now from menu bar(Menu bar is located at the top left side of your explorer. If you don’t see menubar, go to Organize > Layout > Mark Menu bar), go to Tools > Folder Options. Now go to View tab.
Go to Tools from MenuBar
3. Find out the option “Hide extension for known file types“. If it is checked, then uncheck it. It should look like below.
Uncheck "Hide extension for known file types"
Uncheck
4. Then click Apply and Ok.5. Now enter into your USb device. You have to make a new text file here. To do that, right click on your mouse. From right click menu, go to New > New Text document.Create a New Text Document
Create a New Text Document
6. Now rename your text document from “New text document.txt” to “autorun.inf”.Rename it into autorun.inf
Rename it into autorun.inf
7. After renaming the autorun.inf file should be look as above.
8. Now right click on autorun.inf file and select edit. Then it will open with notepad. Copy and paste the following code into that notepad and save(repalce existing file when saving) it.
[autorun]icon=rijans.ico Write the autorun code
Write the autorun code
9. Now you have to put an ico file(icon file which has *.ico extension) in the same place where your autorun.inf file is located. After puting ico file beside the inf file, rename the ico file into rijans.ico . Then your window will look like below. Give custom icon to usb device
Give custom icon to usb device
10. Now you are done. Now to check, open your pen drive from computer then again plug to computer. Look your icon is changed. Note: 1. You have to use icon file. Not image. 2. You can use any icon you want. 3. If you have any image, then convert that image into ico file with icon creator software. 4. You are commended to use 256*256 ratio icon. 5. Your icon name and icon name in autorun.inf shoul be same. For example, if your icon name is techgainer.com.ico then the code should be asNote:1. You have to use icon file. Not image.2. You can use any icon you want.3. If you have any image, then convert that image into ico file with icon creator software.4. You are commended to use 256*256 ratio icon.5. Your icon name and icon name in autorun.inf shoul be same. For example, if your icon name is pcsfix.ico then the code should be as[autorun]icon=techtricksandtweeks.blogspot.in.ico6. If you don’t have icon or icon creator tool then download icon samples from vistaicons.com .
7. Your anti-virus may disturb you. Because anti-viruses treat autorun.inf file as virus assistant.


stop Windows Error Reporting


Try disabling the Windows Error Reporting service: http://img441.imageshack.us/img441/5880/hatag.png

Press the Windows key + R to open a Run box.

Type services.msc

Press Enter.

Scroll down to the Windows Error Reporting service. Double-click it, Stop it and Disable it.


If this is not working 
See article Stop Error RePorting in windows

Stop Windows Error Reporting Permanently


Disable Error Reporting in XP, Vista, and Windows 7

When you’re trying to fix a computer or are setting it up for certain functionality for a business, it can be quite annoying always getting error messages when you know what your doing. Today we take a look at disabling those messages in XP, Vista, and Windows 7.
Note: Error Reporting can be valuable if Windows isn’t working correctly and shouldn’t be disabled unless you’re a system admin or power user. This is not recommended for the average home user. 
sshot-2009-12-19-[23-57-18]
Error Reporting is enabled by default on XP, Vista, and Windows 7. If an error occurs, a detailed message regarding the error pops up and you’re prompted to send the information to Microsoft. This is so they can gather error info from millions of PC’s and helps them create patches and Service Packs. In some cases it will check the error and provide solutions to fix it. When you’re setting up a machine for specific functionality, the messages get very annoying. There are a number of reasons why an experienced user or tech would want to turn them off, so lets begin.
Disable Error Reporting in Windows 7
Open up the start menu and type in problem reporting settings into the search box, or head to Action Center –> Change Action Center Settings –> Problem Reporting Settings. If you used the search, use the “Choose how to report problems” item in the list:
Then you can easily choose the option from the list:
Again, you probably should leave it enabled, but this will let you disable it.
Disable Error Reporting in Windows 7 with Group Policy
Note: This method used Local Group Policy Editor which isn’t available in Home versions of Windows 7.
Click on Start and enter gpedit.msc into the search box and hit Enter.
Local Group Policy Editor opens and you want to navigate to User Configuration \ Administrative Templates \ Windows Components \ Windows Error Reporting and under Setting double click on Disable Windows Error Reporting.
 
Change it from Not Configured to Enabled, then click Apply and Ok and close out of Local Group Policy Editor.
Disable Error Reporting in Vista
To disable Error Reporting in Vista click on Start and open Control Panel.
Make sure you’re in Classic View and double click on Problem Reports and Solutions.
Under Tasks click on the Change Settings link.
 
It’s worth noting here that if you choose Ask me to check if a problem occurs, error reporting is enabled but you get to choose whether or not to send the diagnostics to Microsoft. If you select Check for solutions automatically (recommended) then all data will be sent to Microsoft automatically. Since we want to disable it all together, click on theAdvanced Settings link.
In the next screen under For my programs, problem reporting is…select Off then click Ok to close out of the Problem Reports and Solutions window.
 
Next you’ll see that everything under Choose how to check for solutions to computer problems is grayed out. Click Ok to close out of this screen.
Click Close on the message telling you that Error Reporting is turned off.
Disable Error Reporting in XP
To disable error reporting in XP right click on My computer and select Properties. In theSystem Properties window click the Advanced tab then the Error Reporting button.
The Error Reporting window comes up where you want to select Disable error reporting. Uncheck the box But notify me when critical error occur if you don’t want to see any errors at all then click Ok and Ok to close out of the System Properties window.

Windows 7 to Windows 8 - The Most Significant Improvements


The operating system includes fundamental enhancements, such as better multiple-monitor setups, an overhauled Windows Explorer, cloud-based account syncing, and new ways to personalize your desktop.


Windows 7 to Windows 8 - The Most Significant Improvements
 The most talked-about issue in the lead-up to Microsoft's launch of Windows 8 is the new Start screen, featuring the Modern UI. But Windows 8 has much more to offer than just a revamped interface.
The operating system includes fundamental enhancements, such as better multiple-monitor setups, an overhauled Windows Explorer, cloud-based account syncing, and new ways to personalize your desktop.
Here are 15 improvements to Windows that you'll want to check out in Microsoft's latest OS, including some new tools in the Modern UI.

3 Simple Ways To Speed Up Your Windows Computer


Remember the first time you got your Windows computer? It probably booted up pretty quick and everything loaded fast. After months of using it, things started to slow down. It takes much longer to reboot now and the desktop takes a couple of minutes before it completely loads. These are but some of the signs of a slow-running Windows PC and you can make it fast again just like when you first got it. We’re going to teach you how to speed up the Startup time, Start Menu, and Right Click Menu loading of your Windows computer with a few easy-to-do tweaks.
Must Read Windows Speedup Articles:
1. Speeding up your Windows PC startup time
You can optimize your computer’s startup speed by launching Run on your Windows computer and typing“msconfig” without the quotes. This will take you to the System Configuration Settings which has five tabs – General, Boot, Services, Startup, and Tools.
Under the General tab, you’ll find 3 startup selections: normal, diagnostic, and selective. During normal startup, all device drivers and services will be loaded by your computer. If this is ticked, it may be the reason why your computer is taking long. Choose either diagnostic or selective startup to speed up the starting time of your Windows computer. Diagnostic startup only loads basic devices and services whereas with selective startup, you can choose to load neither system services nor startup items. After making a selection select “Apply.”
Under the Boot tab, select Advanced options so you can choose the number of processors to facilitate boot speed. If you have a dual-core or quad-core processor, assigning more than one of them to help with the start-up process can significantly boost your computer’s speed. Unfortunately, this optimization tweak is not so efficient on power so if you’re using a laptop, expect some battery drain after startup.
Finally, there’s the Services and Startup tab where you can specifically choose which services and startup items are going to load.
2. Speeding up your Windows Start Menu
The Start Menu is another serious offender as it often takes time to load. Once again you need to open Run but this time, you will type “regedit.exe” to launch the Registry Editor. Go to theHKEY_CURRENT_USER folder and find Control Panel –> Desktop –> MenuShowDelay. Then, double click MenuShowDelay to edit its value. Type in the numbers on the blank and hit “OK.” Remember, the lower the value the faster the Start Menu will load.
Another trick for speeding up your Windows Start Menu would be to limit the number of shortcuts on your desktop. It could be that you just have too many icons on your desktop and that’s what is causing your computer to take long when loading the Start Menu.
3. Speeding up the Right Click Menu
Yet another disappointing slow-down that Windows users experience is the time it takes the Menu to show up when hitting the right click. Installing third-party programs that allow you to remove items from the context menu should speed it up.

Author biography: Judene Macariola is a tech geek and a Windows PC expert for 10 yearsShe works forBroadbandExpert.com which specializes in providing high speed internet advise

Top 15 Easy Ways To Speed Up Your Windows Xp


Top 15 Easy Ways to Speed Up Your Windows Xp:
Here is Collection of Top 15 simple and easy ways to boost your windows XP performance and speed up tasks.Make your Xp Super Fast after reading this article.
1.Disable Extra Startup Programs
There are certain programs that Windows will start every time you boot up your system, and during the startup phase, they’re all competing for a slice of your CPU speed. Extra or unwanted items in the startup list will definitely increase your startup time, perhaps by several minutes. Some common examples are things related to AOL, RealPlayer, Napster, instant messengers, and video managers. If you’re not sure about an item, no big deal. You can turn it off, restart your PC, and see if everything seems to work. If not, you can always go back and re-enable an item in the Startup list. This tip alone should speed up yourstart-up by 250%.
Here are is what you have to do:

Tips For Speeding Up An Old PC


Tips For Speeding Up an Old PC
It’s so easy to feel frustrated with your 2-year old computer. With the latest whizz-bang gadgets coming out every month, your trusty desktop can seem like it is an old classic. The sleeker models with all the upgrades can make your computer unit feel like it is truck beside a sports car.  But, don’t throw it out just yet. There are so many things that you can do to make it perform like it is new.
Here are a few things that can help you do that:
Get Space
Everyone needs space, even your computer. We end up with more than a few bytes of photos, music, movies and programs in this digital world. All this data takes time to read and process. These precious milliseconds add up and can make simply booting up your computer and surfing on the net feel like an eternity.
There are 3 things you can do to solve the space issue. First, clean-up your hard disk. Delete temporary internet files, empty your recycle bin and uninstall programs that you rarely use. If you still have a lack of space, transfer your files to an external drive. This way your computer does not always have to process it when you boot up. If all fails, consider replacing your current hard disk with a solid-state HD. Without any moving parts, the speed of processing and writing files takes less time. It’ll make downloading and processing files faster.
Add RAM
You do not need to replace your computer to get a faster unit. Look into buying and installing a higher RAM card. The difference can be quite exponential between a 2 gig and a 4 gig RAM card.  You’ll be able to play better games and run memory heavy programs smoother. If you are into watching high definition movies or playing games that are heavy on graphics, consider buying a better video card. This way you can get the extra memory to keep your computer from lagging.
Reinstall Your OS
If none of the above is working for you, consider “renewing” your computer by reinstalling your operating system. It can be quite tedious to do, but will be worth the effort. Reinstalling your OS will help you remove malware and other programs that slow down your computer. You can also start fresh by choosing the right programs and file management protocols to keep your computer zipping along smoothly.
The Bottom Line:
Don’t just be consumers; instead, think of yourself as a “tuner”. Consider modifying and upgrading components of your computer before you head out and buy cheap desktops. It’ll save you a lot of money, and, most of all, can be quite fun to do.

My Computer Takes A Long Time To Load The Desktop


Problem:
When I turn on my computer and log in, my computer takes a long time to load the desktop and system tray icons.How do i get rid of it? And fix the the desktop problem?

Windows Activator 7 With Crack Software Keygen


Free Download
Windows 7 Activator Download | Crack Software
for windows 7 with Keygen. 
Download Windows 7 Activator V2.0.4 Any version 1.5MB 
and activate your all windows versions. This is great software 
for windows activator, for windows apps and windows software 
to download
You can also make your windows 7 genuine with full version Activator
Download and install and your windows will be activated enjoy.
Windows 7 Activator Software and Loader 
IF It is not Working Then Download this Torrentz Window seven crack